Short answer
If your Journal has the berry collection job, start with the illustrated collection-to-turn-in example. Need equipment first? Check Grigory, Ilya and the supply checklist. Carry matching ammunition, recovery supplies and empty backpack space; verify the collected item before walking back to the named recipient.
Your first outing: prepare, complete one task, return
This is a suggested route through the guide, not a mandatory quest order. Check what your own Journal offers before leaving.
- Prepare a kit you can maintain.Check ammunition, recovery supplies and backpack space. Before buying an upgrade, compare its repair class and maintenance budget.
- Choose one named objective.If you have the berry collection job, use the illustrated berry example. If your Journal says Catching Current, use its detector and magazine checks instead.
- Verify the item before returning.Check the collected item and requested amount against the Journal, then visit the named recipient. A plant interaction or map marker alone does not prove completion.
- Check storage before leaving supplies.Note the camp and tab, then reopen the stash to confirm the items are there. Other camps do not share the main village inventory under the documented 0.7 rules.
Choose the help you need
Already on Catching Current? Skip the starter outing and use the detector and missing-magazine answer. It is a different task from gathering berries.
New to the game? Follow the first-run checklist below. Already stuck? Go straight to healing, storage and job checks, weapons and attachments, or map navigation. Looking for what changed rather than a walkthrough? Use the updates and roadmap guide.
Storage advice is build-sensitive: in 0.7, other camps have their own storage rather than a shared inventory. Read the village expansion and camp storage rules before leaving supplies behind.
Before leaving camp: get ready for one short outing
Check the selected mode before leaving. Since 0.7.0, each run has its own autosave, but that is not an unlimited undo history. Compare mode costs and death-screen choices; Explorer does not protect every backpack item.
Source: Scavland Steam store page ↗
- Inspect your weapon and ammunition.Check condition and matching ammunition before relying on the gun. For damage or an unavailable repair action, follow the maintenance-item checks.
- Check recovery conditions.A lit campfire can heal when Energy and Hydration are good. Look for the recovery indicator; if it does not appear, use the healing checks. Bring recovery supplies for the trip.
- Leave backpack space and remember the stash.Store spare supplies, then note the camp and selected tab. Under the 0.7 rules, another camp's stash does not share the village's items.
Source: Day One Patch — Explorer, campfire and durability changes ↗
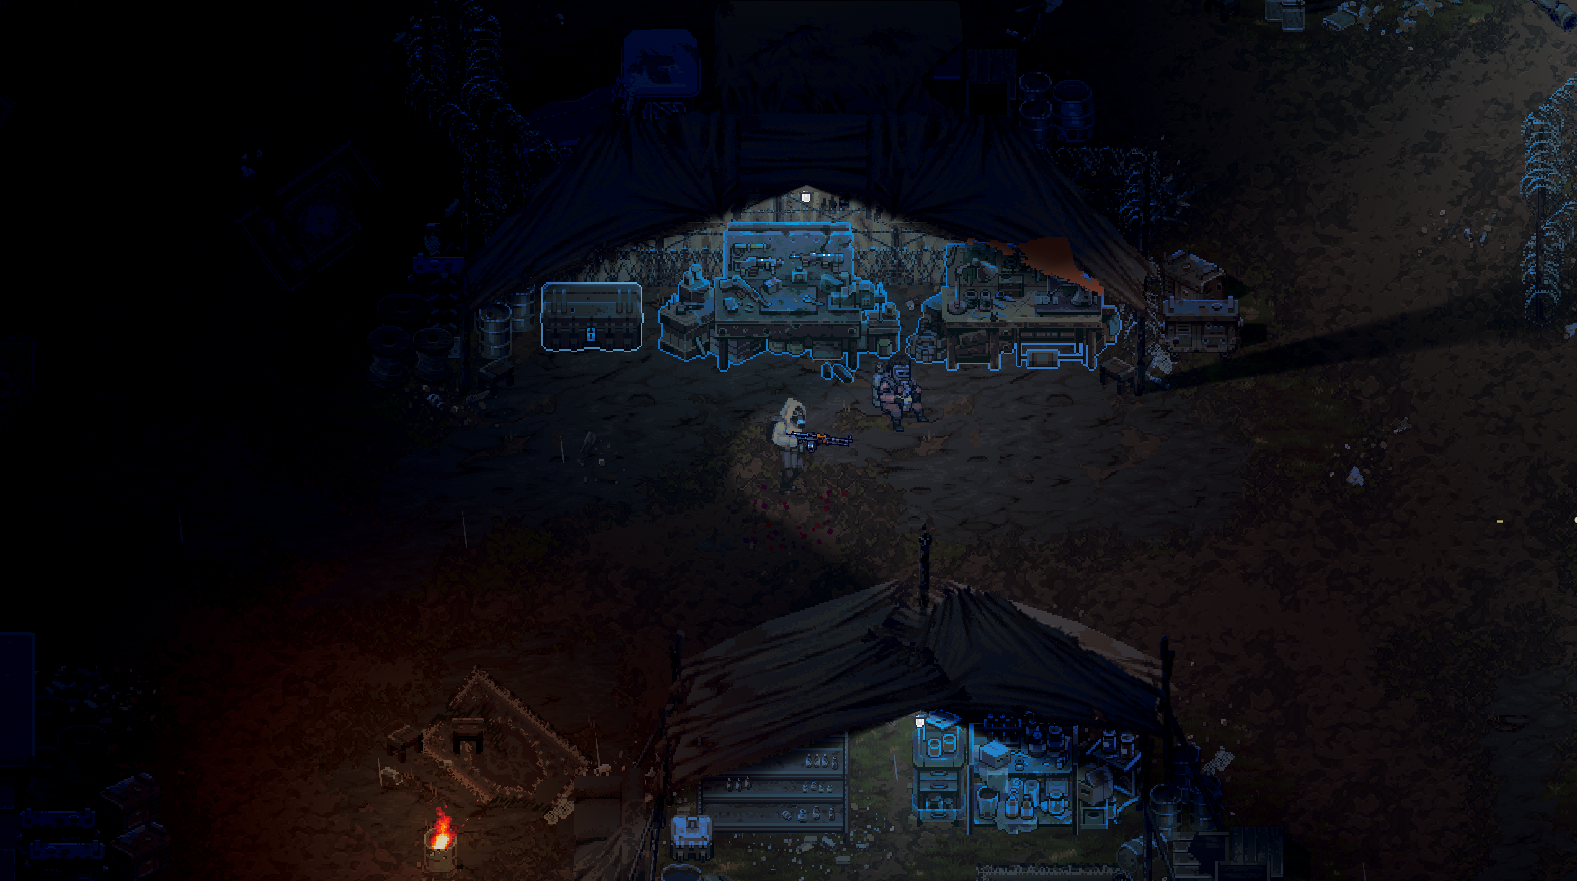
Use the picture to distinguish the chest from the benches, not to navigate from your spawn. For the actual storage interface, open the stash-tab screenshot and transfer checks.
Who should I visit before spending my money?
| You need | Who or what to check | Before buying |
|---|---|---|
| Your first rifle or basic weapon-repair blueprint | Grigory in the starting town, according to Georg's community guide | Read the current stock and rank requirement; older unlock thresholds may have changed |
| Water | Ilya sells Water in the 0.7.0 notes | Compare your remaining supplies with the planned trip |
| Mechanical Components | Nadja: available at Rank 1 in 0.7.0 | Buy for a recipe you can actually craft, not a guessed future upgrade |
| Advanced or Expert weapon repair | Volodymyr sells these kits and the Expert blueprint in 0.7.0 | A blueprint is not a ready-to-use kit; inspect your weapon and repair item first |
Source: Georg: starting-town Grigory reference; guide rewritten September 20 for 0.7, read September 21 ↗
Source: Developer 0.7.0 trader changes; checked September 18 ↗
Suggested packing check: a usable weapon and its ammunition, recovery items, food, water and room for the objective. Check the recipe list before selling crafting materials. There is no fixed purchase list that suits every save.
Before upgrading: can you maintain the new equipment?
Read Repair Class on the proposed gun or armor, then check the matching weapon recipe or armor recipe. Budget for a usable kit and ammunition as well as the purchase. Do not spend the repair budget on a blueprint and assume it is already a consumable.
Before selling the last of your materials, use the keep-or-sell list. If your old rifle is becoming the backup, check the assembled weapon's slot size before buying attachments for it.
Need a supplier beyond this starter list? Use the trader-by-item shopping table to separate water, repair kits and crafting components before planning your next trip.
Which job should I do first?
- Read what counts as completion.Check the exact item, amount and recipient in the Journal. For berries, use your own objective's quantity and the illustrated harvesting guide, not an older post's fixed count.
- Check how to track the job.Review the selected task in your Journal. If a marker is absent, check Job tracking and deliveries before assuming the task is broken.
- Choose a route you can retrace.Compare the destination with your supplies. If you do not understand the route, use the map guide before taking an underground detour.
First collection-job example: berries
Use this example only if berries are your active objective. A September 5 player report names ROSA and 15 berries; your Journal takes precedence over that older report. This is a collection workflow, not a verified route from every spawn.
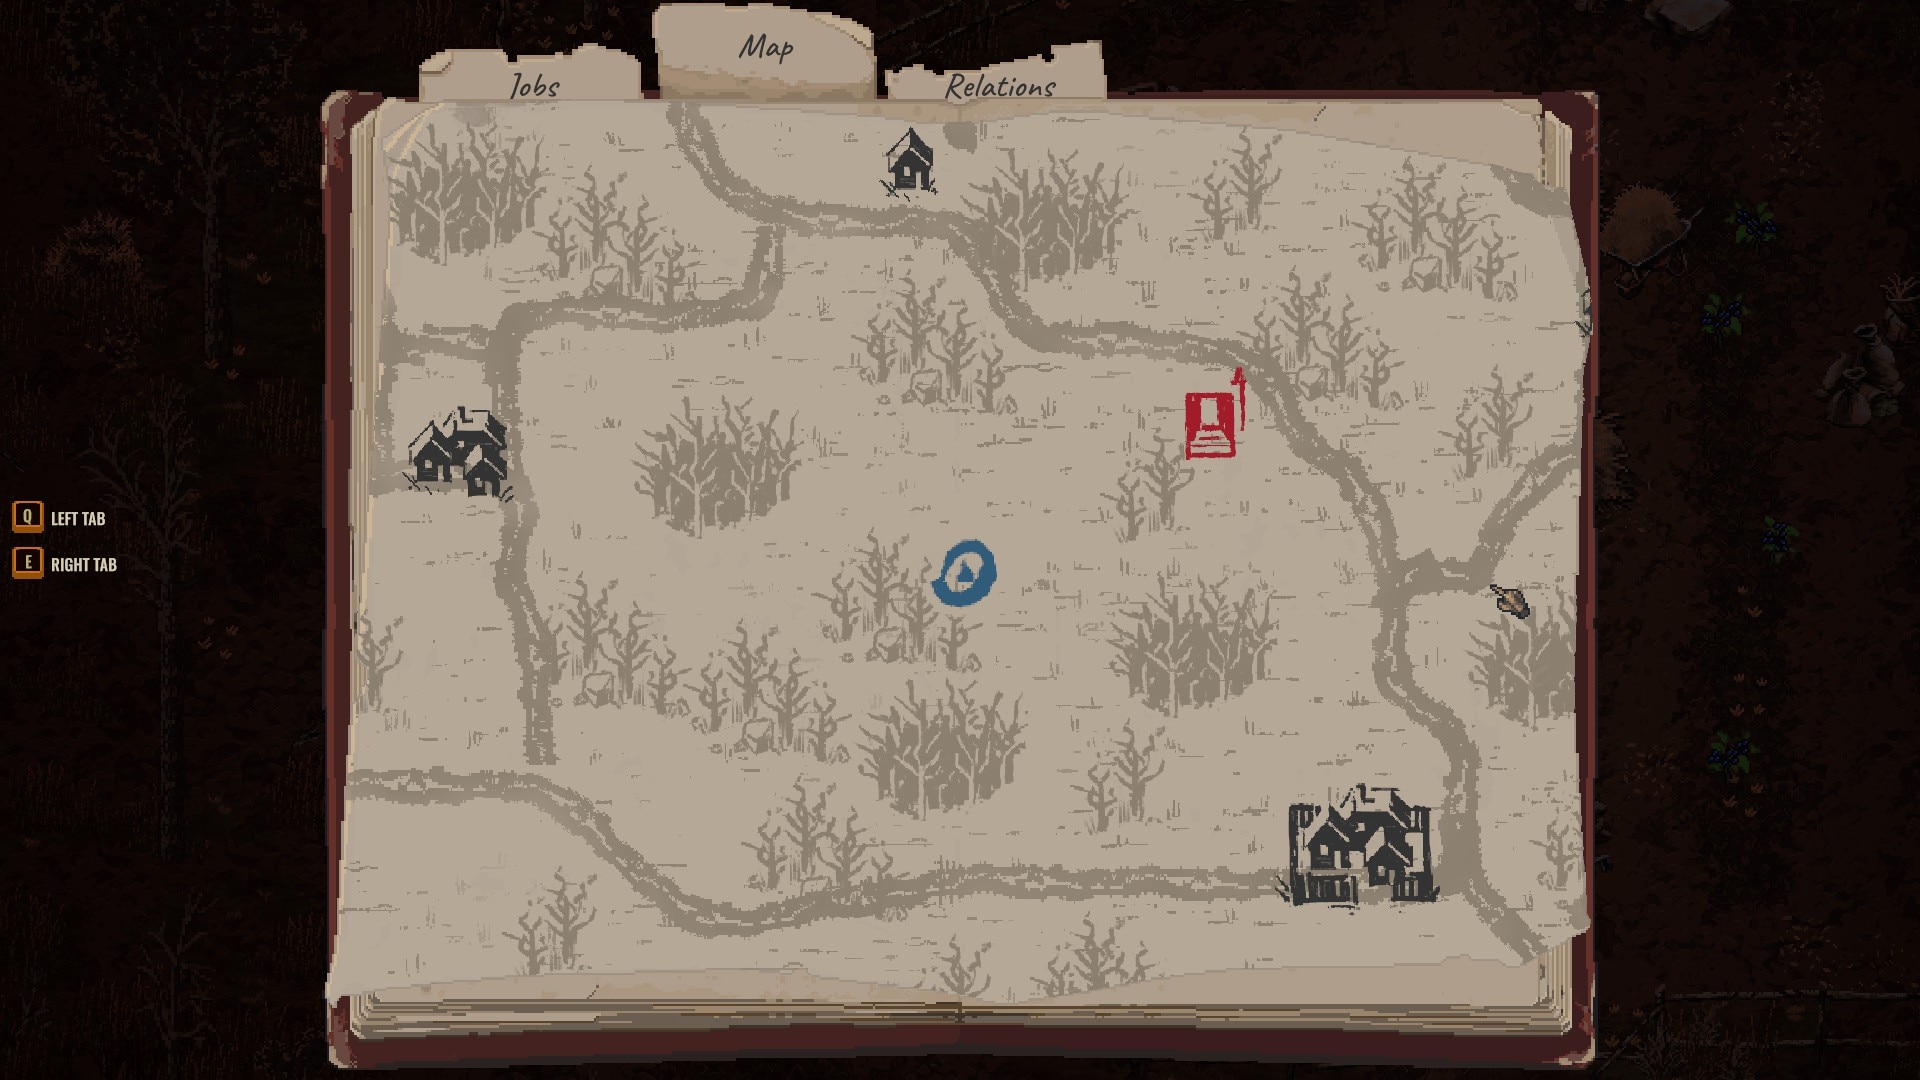
- Before leaving: note the recipient and quantity.Leave enough backpack space. Use the location index and compare the screenshot's roads with your discovered map; the blue marker is not your spawn.
- At the plant: use your bound Interact action.The 0.6.0 controls change supports harvesting through Interact. Inspect the item received and the objective counter instead of relying on the collection animation alone.
- Before returning: confirm you have the required item.If the backpack changed but the counter did not, compare the exact item with the objective. Use the berry troubleshooting branch before repeating the trip.
- At the recipient: confirm the Journal changes.Use the NPC named in your objective. Keep the quest items until the turn-in is complete, then store surplus and prepare for the next job.
Source: Original berry-job report; later control changes take precedence over the old knife advice ↗
Confirm the hand-in, not just the pickup
For Fetch Jobs, 0.6.0 allows partial deliveries. Read the remaining amount after each hand-in: collecting some items or returning to the NPC is not the same as completing the Job. Item Info identifies active requirements; orange Quest Items and green Job Items are separate categories.
Source: Update 0.6.0 — partial Fetch deliveries and item markers ↗
Before another trip: if collection works but turn-in does not, compare the item, remaining count and recipient first. Do not collect another full backpack to solve a dialogue problem. The images above are location references, not a photographed playthrough from acceptance to completion.
During the run: when should I turn back?
Head back when your objective is complete, you need recovery supplies or maintenance, or you no longer have a clear return route. These are conservative planning suggestions, not hidden game thresholds.
- After collecting a job item, check the backpack and objective counter before moving on.
- Do not sell a required quest item just to make room for ordinary loot.
- Roads and information reveal as you explore. A missing label does not by itself mean the map is broken.
- If a gun stops firing, read its prompt and check ammunition. A jam and a disabled repair action need different checks.
Back at camp: finish one run before starting another
- Confirm the turn-in.Read the Journal after talking to the issuer. A return objective does not prove you received the item. For Bogdan, separate missing lime from dialogue failing with the item present.
- Check important transfers.Open the intended camp and tab. After moving a valuable item, confirm it on the intended side of the interface before transferring more.
- Prepare the next outing.Inspect weapon condition, ammunition and recovery supplies again. Choose the next objective around what you can carry and use.
How to tell it worked
You are back at camp, important items are visible in the expected backpack or stash tab, and the Journal reflects any completed turn-in.
If it still fails
Match the symptom in the table below. Do not repeat an entire expedition to solve a storage-tab mix-up or a dialogue problem.
Stuck on your first expedition?
Choose the problem you have now. These checks turn a short practice run into a repeatable routine.
| Problem | First check | Next guide |
|---|---|---|
| Campfire will not heal | Light the fire and restore Energy and Hydration. Look for the recovery indicator. | Healing conditions |
| Backpack is full | Store spare supplies and note which camp you used. Check the current storage rules before expecting items in another camp. | Camp storage and expansions |
| Gun is badly damaged | Check condition before firing again: below 30% durability carries an explosion risk. | Repair and jam checks |
| Unsure what to do next | Read the objective, choose a route you can return from, and review the Job in your Journal. | Tracking and deliveries |
Source: Developer notes: 0.5.169 campfire, stash and durability changes; checked September 14, 2026 ↗
Need medical crafting options? Alexei sells the Advanced Bandage, Army AI-2, IFAK and Stimpack blueprints. Check whether you need a recipe or a finished item before spending your supplies.
For a gentler start, compare Explorer mode before beginning a new game. Its equipment-retention rule does not protect every backpack item. If navigation is the problem, open the map and mini-map guide.
What to learn before taking a long job
What experienced players suggest for the first few trips
Community experience, not a fixed build MigraineMax's September 10 early-game guide recommends starting with manageable collection jobs, returning to sell and resupply, and choosing reputation work around the equipment you want. It also suggests checking Sasha's requested weapon jobs before selling a damaged gun as ordinary loot.
Use the idea, not its old payout figures: compare the active job's required item, reward and travel cost with a normal sale. Keep a small healing, food and water reserve. The guide predates 0.7's repair and economy changes, so its condition limits and exact profits are not current promises.
Source: MigraineMax — A very basic Early Game guide; player advice, published September 10 ↗
Need an example rather than another general tip? Use the berry collection screenshot and checklist, annotated weapon-workbench reference, or developer's crash-site tracking instructions.
Beginner FAQ
What should I do first in Scavland?
Check controls, choose a manageable route, bring one dependable weapon and a medical buffer, take a small amount of loot, then return and sort it. Learn the loop before attempting a deep bunker run.
Is there a Scavland beginner mode?
Explorer Mode is documented as a separate, less punishing mode in the current guide set. Exact differences can change with updates, so use the mode page for the current patch boundary.
Should I accept every job?
No. Compare the issuer, route, supplies, and return risk. Track the job you can actually complete and record what changes after turn-in.
Why is my map missing locations?
The official listing describes a dynamic map whose roads and information reveal through discovery. Check the journal, map, mini-map, and discovery state before calling it a bug.
What should I keep from my first expedition?
Keep items that support the next run, active jobs, healing, ammunition, and repairs. The exact best item list is build-dependent and should not be copied from an unverified table.